
Connecting a 3rd generation Nest Learning Thermostat is pretty simple if you know where to connect the wires. In this blog I have some instructions to connect to the Bosch 26 HRC furnace. The first part is about the old connection and the second part is about connecting the Nest.
First I didn’t get it to work, this was because the OpenTherm module was disconnect for the previous installation. The red circle shows the disconnected plug.
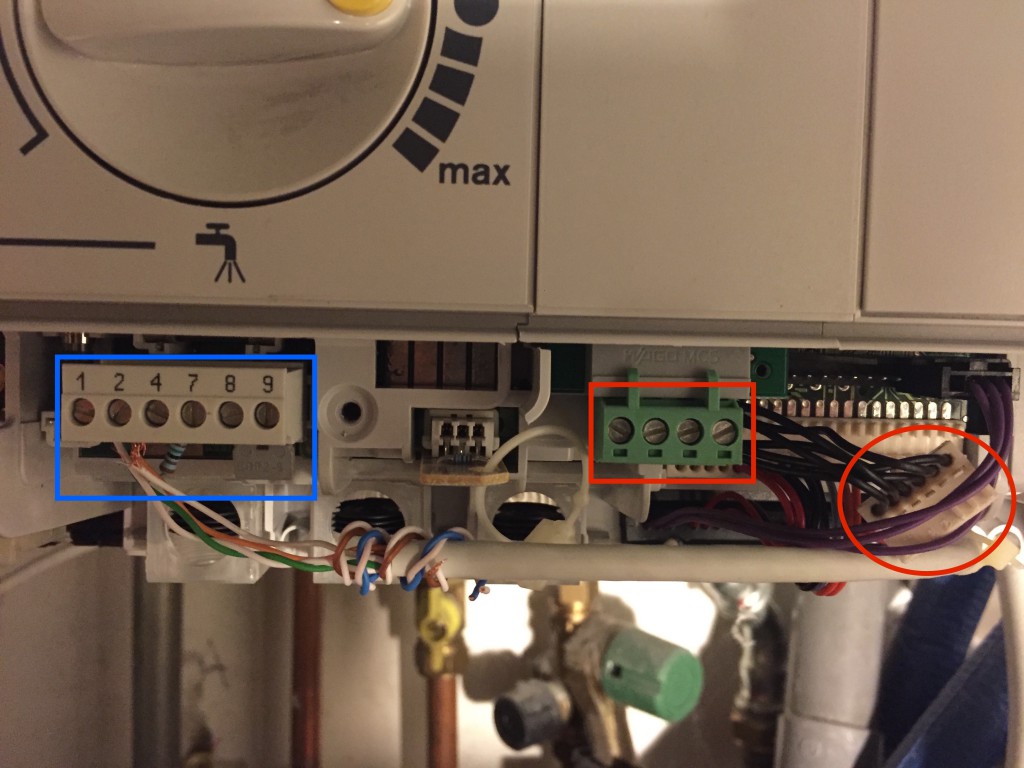
Blue square = Bosch connection, red square = OpenTherm module connections, red circle = Opentherm connector.
This OpenTherm connector was unplugged/disconnected because the previous thermostat was a simple on/off (non-modulating) thermostat which was connected like this schema on the Bosch furnace:
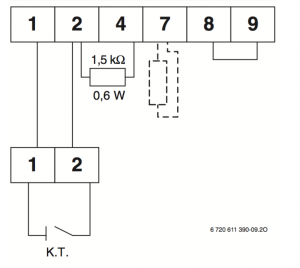
Connect a non modulating thermostat to Bosch 26 HRC (image source: Bosch 26 HRC manual)
So the very sloppy wires in the blue square pins 1 and 2 are connected to the old thermostat in the living room. The resistor is connected between 2 and 4 and there is a bridge between 8 and 9.
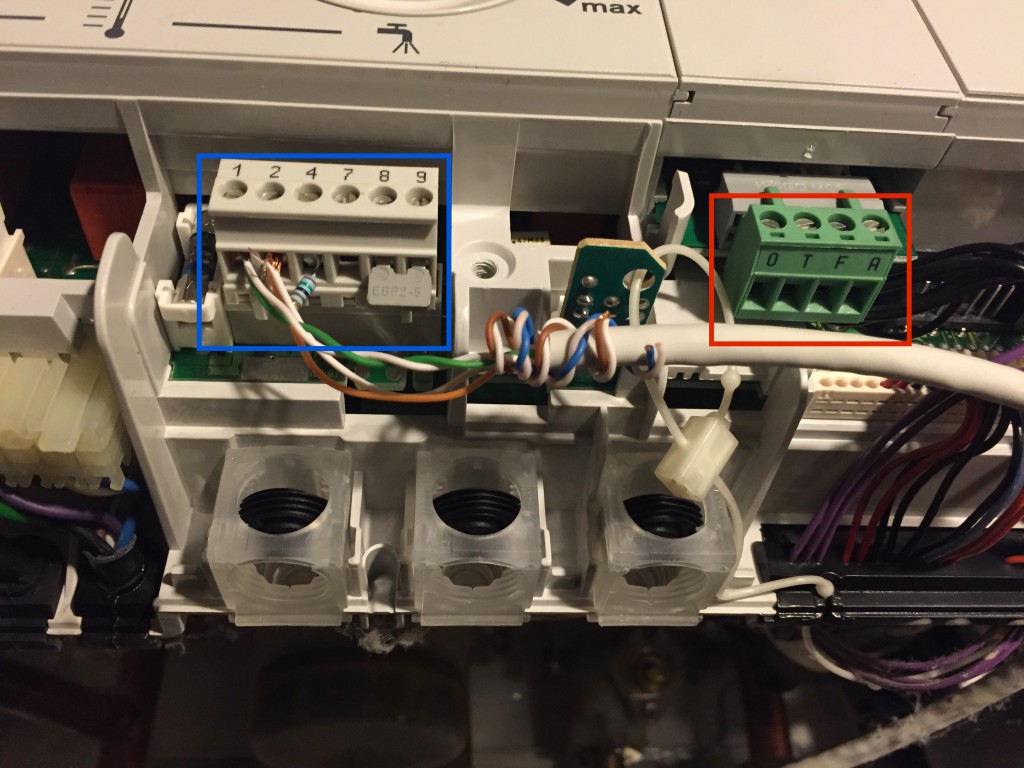
Blue square = Bosch connection, red square = OpenTherm module connections
So this was the old working connection with an old non modulating thermostat. The Red square in the picture above shows the pins connected to the OpenTherm module. Bosch calls this the OTM1 in their manual. 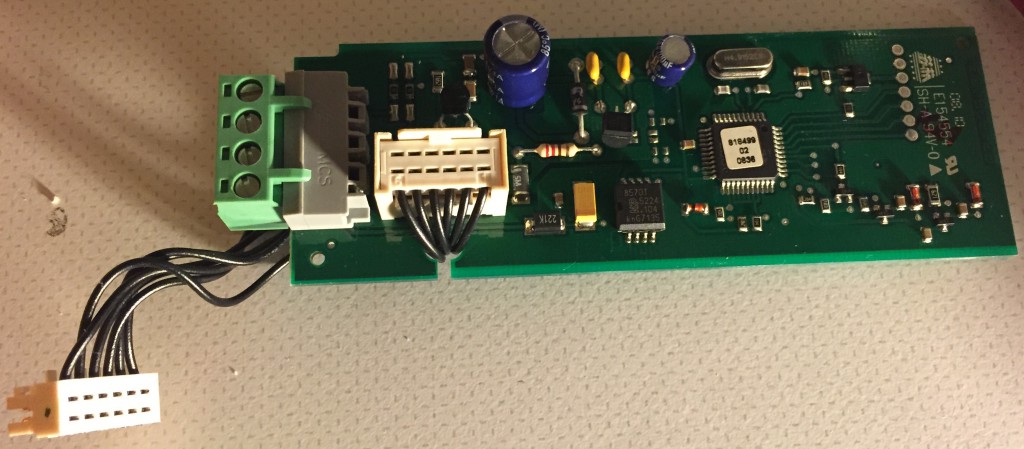
OpenTherm Module (OTM1)
I removed to old wires (in the blue square) and placed the resistor as a loop on pin 7 (as the original state) and then plugged in the OpenTherm plug onto the board just as the picture below:
Connect the OpenTherm Module (OTM1) to the furnace (image source: Bosch 26 HRC maunal)
Now connecting the Nest is simple. Nest comes with a Heat Link unit which you have to connect to the furnace and a thermostat which you probably place in your living room.
The 3rd generation Heat link looks like this:
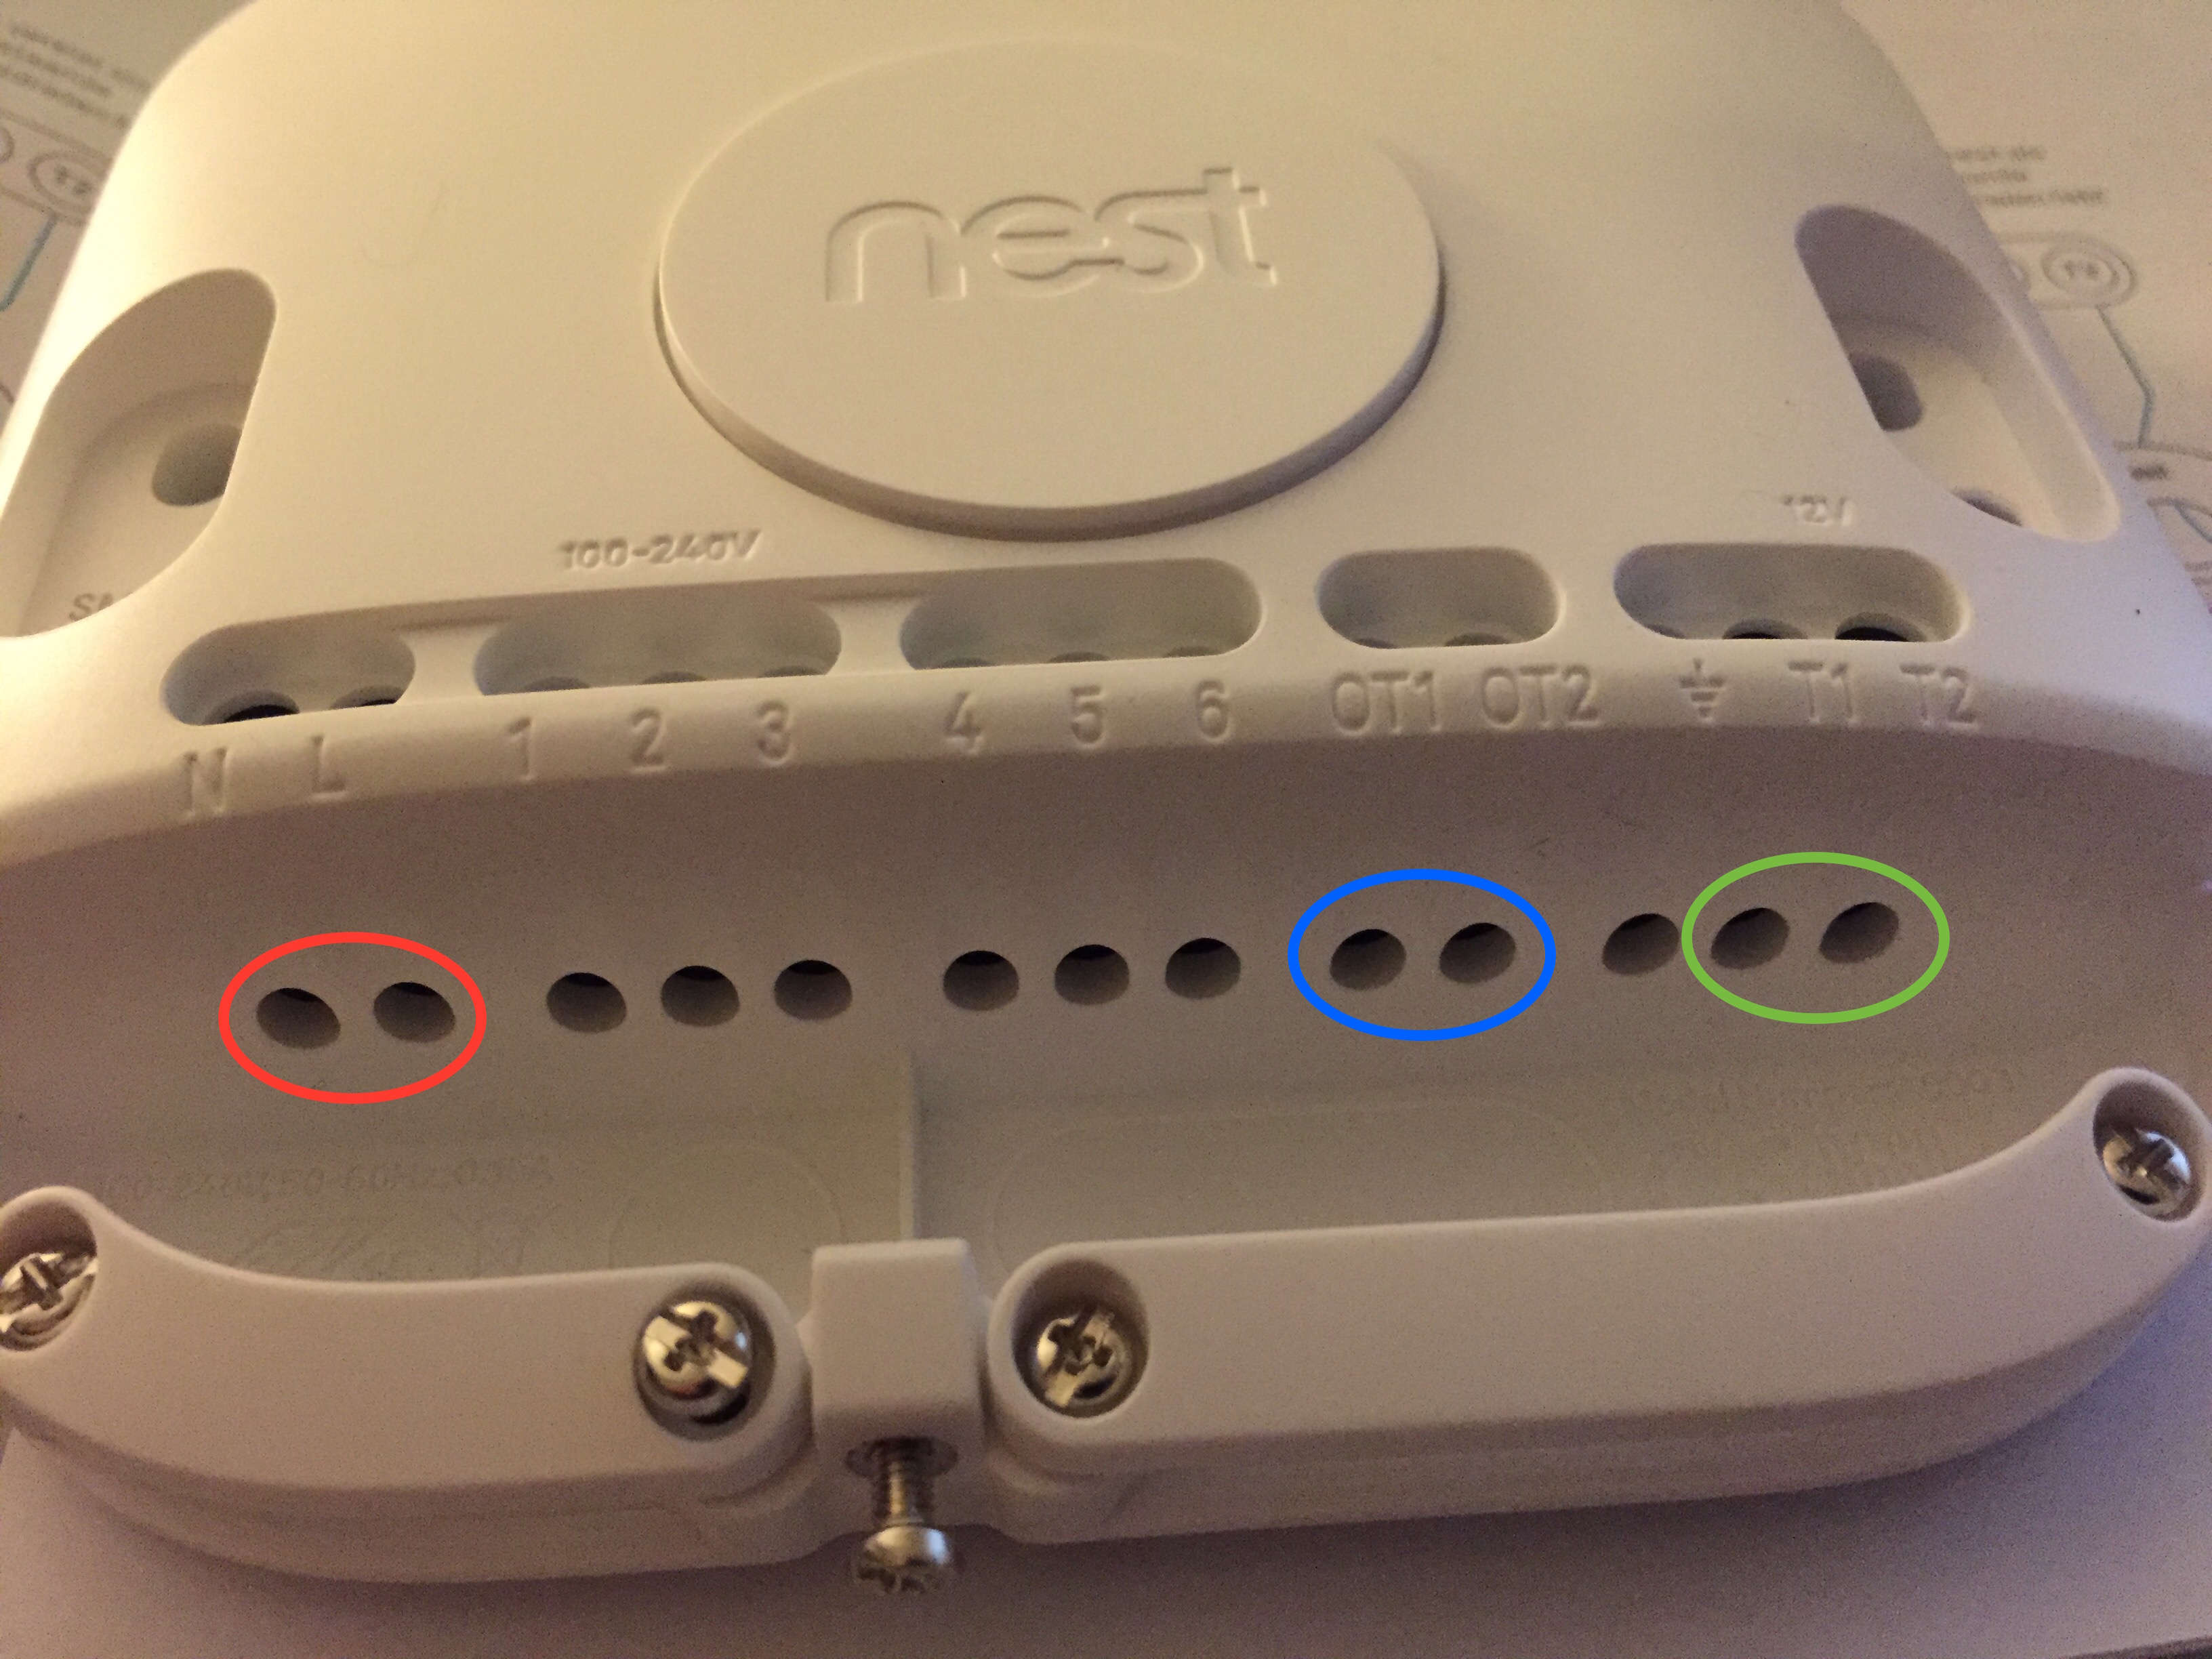
Nest Heat Link
The three circles mean;
- Red; 230V to power the Heat Link unit
- Blue; connections to furnace OpenTherm adapter pins O and T
- Green; connection to the Nest Thermostat
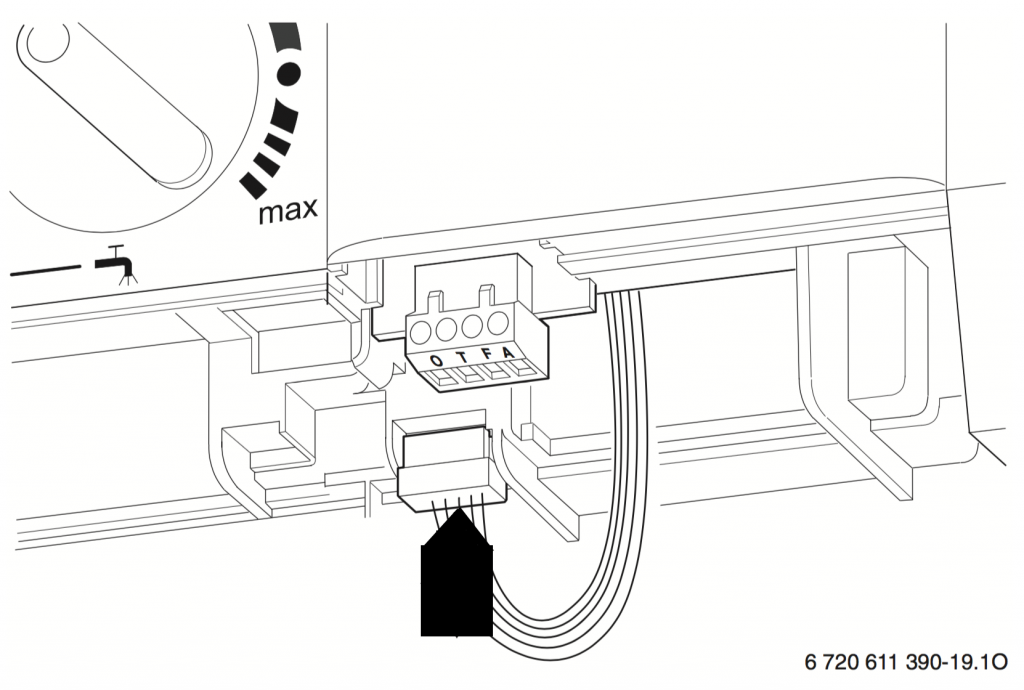
In the Installation Guide you can find this image for this 3 connection pairs.
 Nest OpenTherm connection schema (
image source (PDF))
That’s all. the most time I spend figuring out how to the connect the Bosch OTM1 module to the furnace and remove the old wires. good luck!